


Thank you for your purchase! Every purchase made helps us create, design and refine our products for everyone in the community. Without your help and support we would not be able to make these projects a reality.
Parts List:
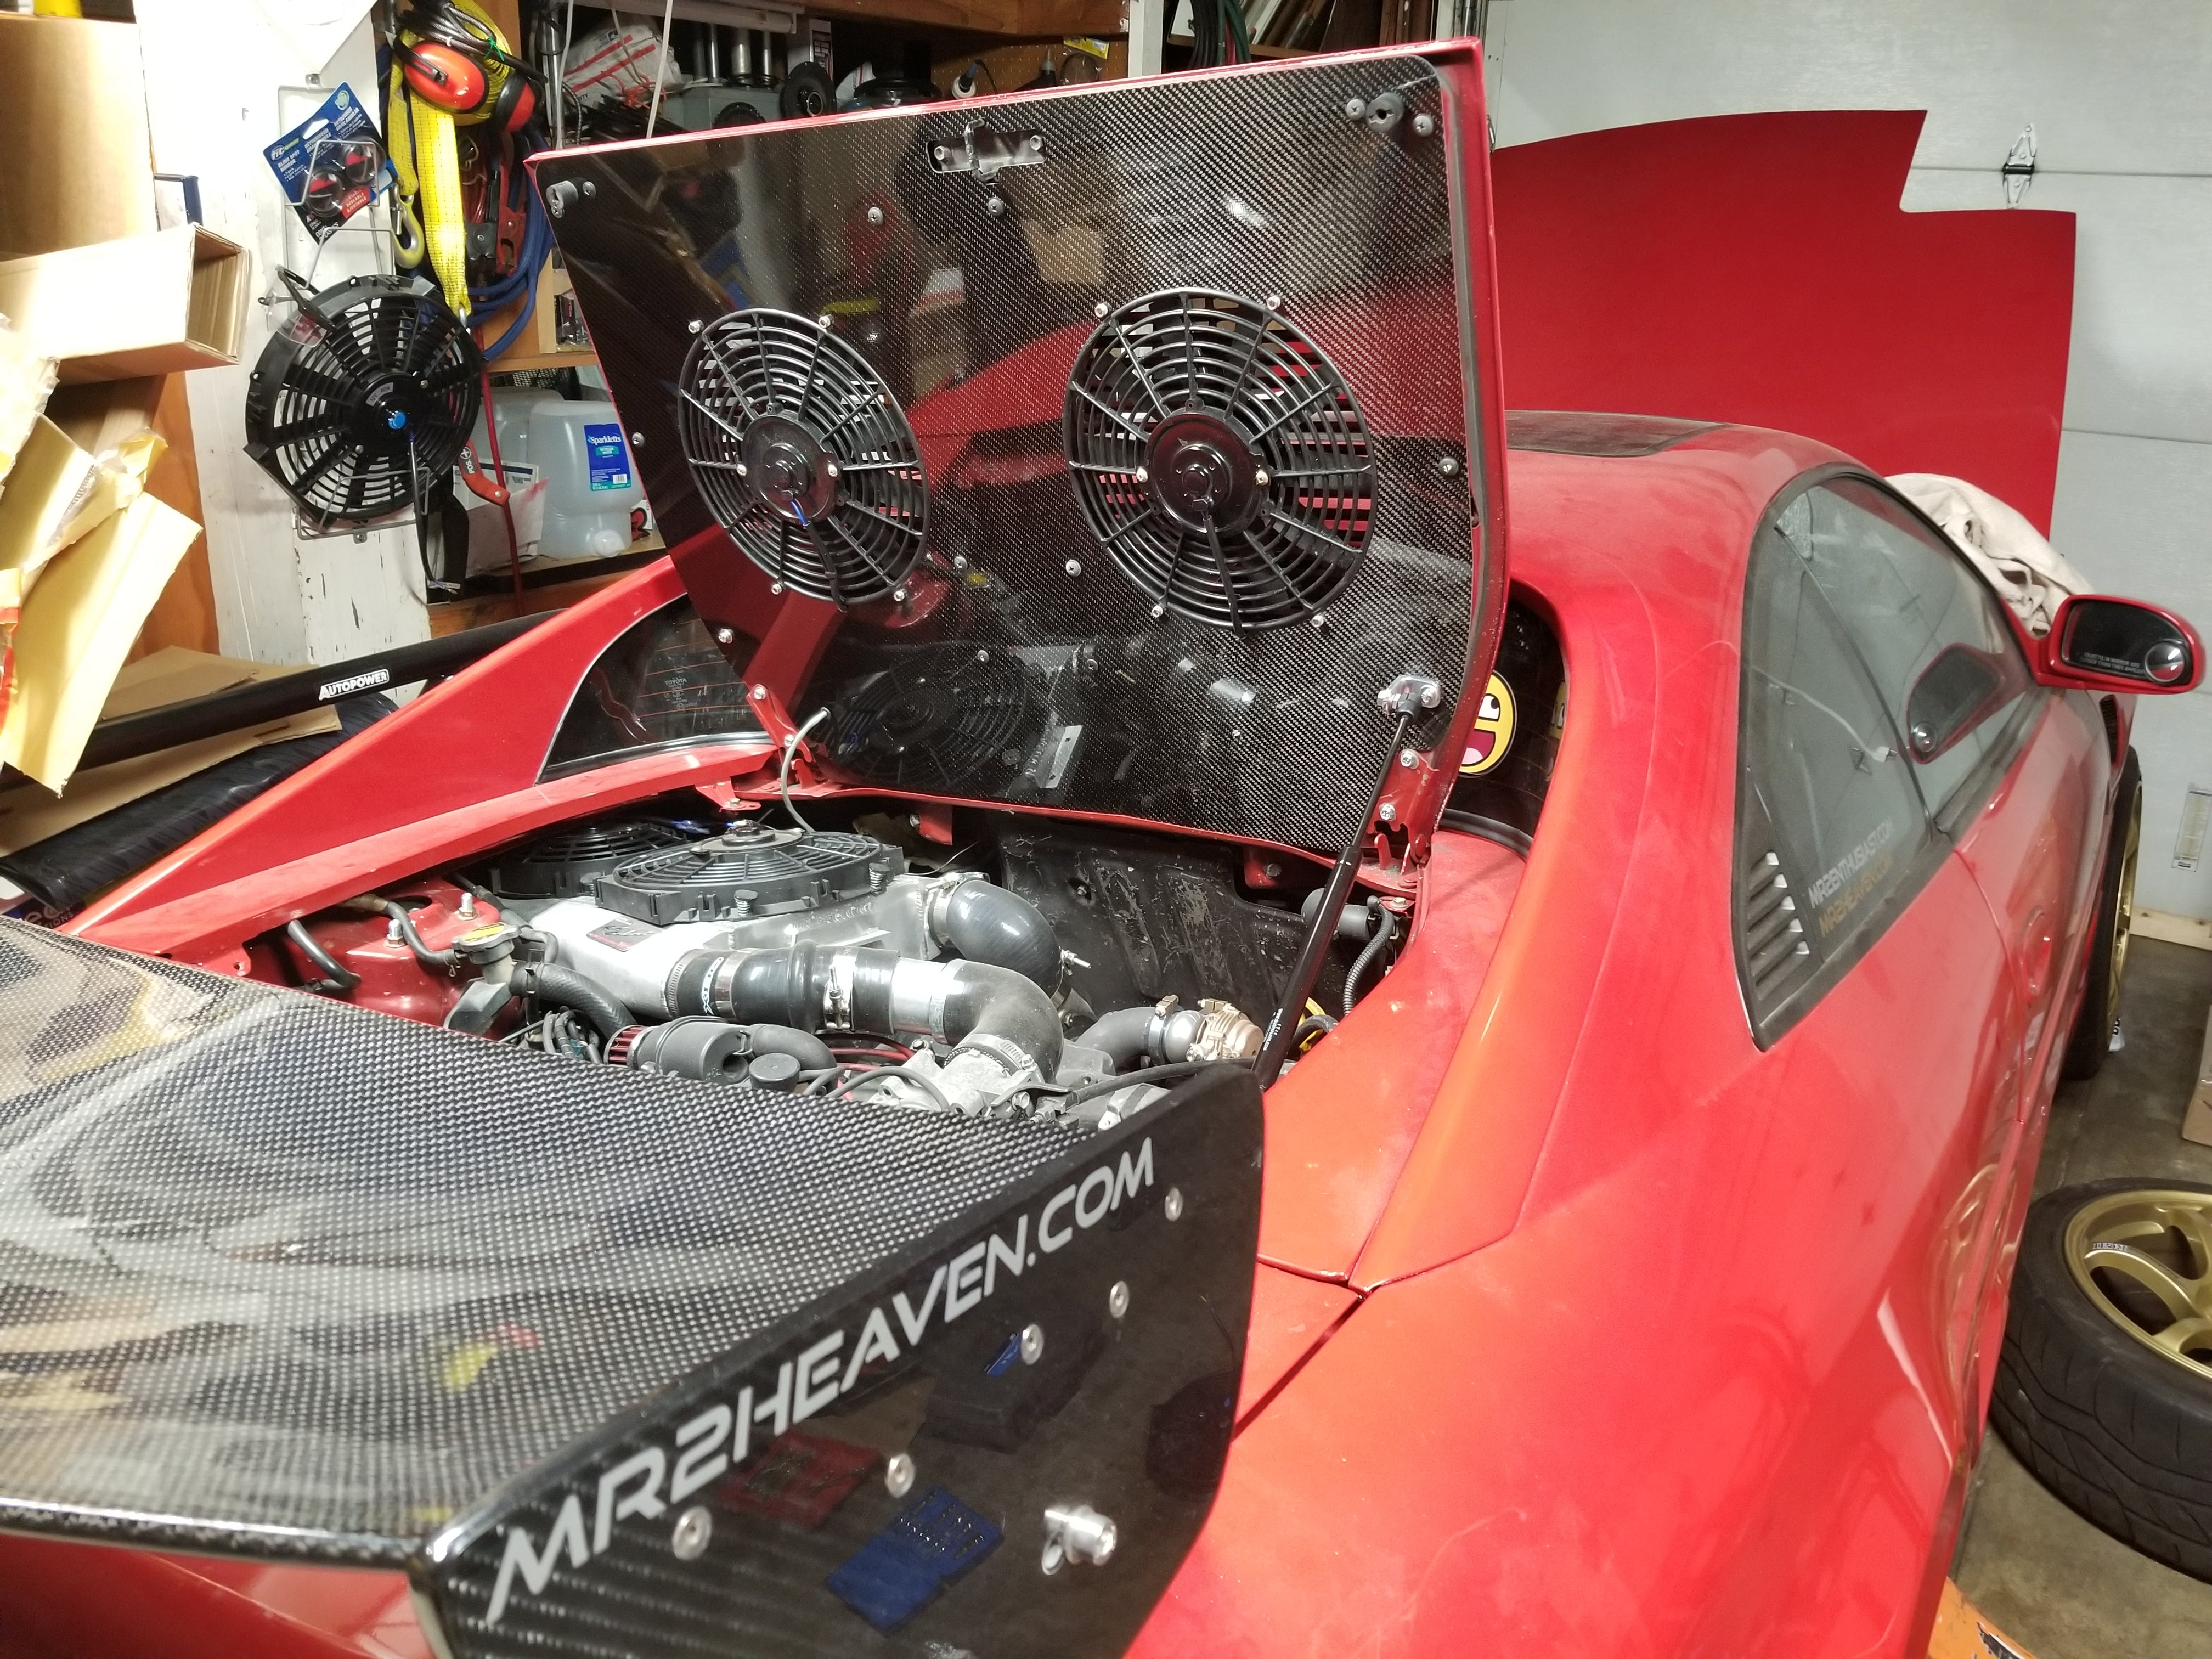
- 1x Carbon Fiber Panel
- 8x 1" Nylon Spacers
- 8x 1/4-20x1.5" Socket Head Allen Screws
- 8x 1/4-20 Lock Nuts
- 1x Rubber Grommet for wiring
- Optional - 2x 12" Fans
Some required tools
- 10mm hand socket & hand tool (To remove engine lid for easier installation)
- 1/4 socket
- Phillips screw driver
- Wire cutter & crimping tool
Before proceeding, check all screw mounting areas to make sure they are still good and undamaged. If you need to repair your mounting holes, fill with clear epoxy and re-drill pilot holes to prepare for screws
Step 1: Remove all packaging material from CF fan lid. Lay the shroud on a flat soft surface. Install the 12" fans as shown below using the supplied hardware kit. Install the spacer in between the carbon fiber fan lid and fan. Lightly tighten. Be sure to not to over tighten.


Step 2: Remove engine lid and place on a flat surface. Install the fan shroud onto the engine lid. Reinstall complete engine lid back onto the car.
Step 3: For wiring, we recommend only running this setup with a dedicated wiring harness system as the stock circuitry would be quite maxed out with his setup and may occasionally pop fuses/blow your fan relay in the trunk.
There are many ways to wire up the fans. Dedicated wiring harness diagram may vary very slightly, but generally this is the layout

Generally,
Step 4: Enjoy!
Notes
- Depending on your setup, for 3SGTEs with side mount intercooler, or top mount intercooler kits, blowing air into engine bay is best for reduced IATs. If you are on a V6, may be better blowing air out of engine lid. Do some testing yourself, but our testing shows for 3SGTE, blowing in is best and significantly more efficient for reducing IATs and providing more fun/hp/torque
- Fan direction can be flipped by reversing the wires, but they definitely blow stronger/move more air when blowing into engine bay than out
Please don’t forget to leave us feedback or give us a shout out on any of the Facebook MR2 pages/forums etc.
We really hope you like our products as much as we do and look forward to bringing you many more new and exciting products!
If for some reason you encounter an issue or problem with any of our products, please don’t hesitate to get in contact with us so we can do our best to help you out.
Email: Sales@mr2heaven.com
Thank you again for your business and support
Enjoy!
-MR2 Heaven
Disclaimer:
MR2 Heaven is not liable for any damages, injury directly or indirectly related to the installation, use or mis-use of these components.