


Thank you for your purchase! Every purchase made helps us create, design and refine our products for everyone in the community. Without your help and support we would not be able to make these projects a reality.
Parts List:
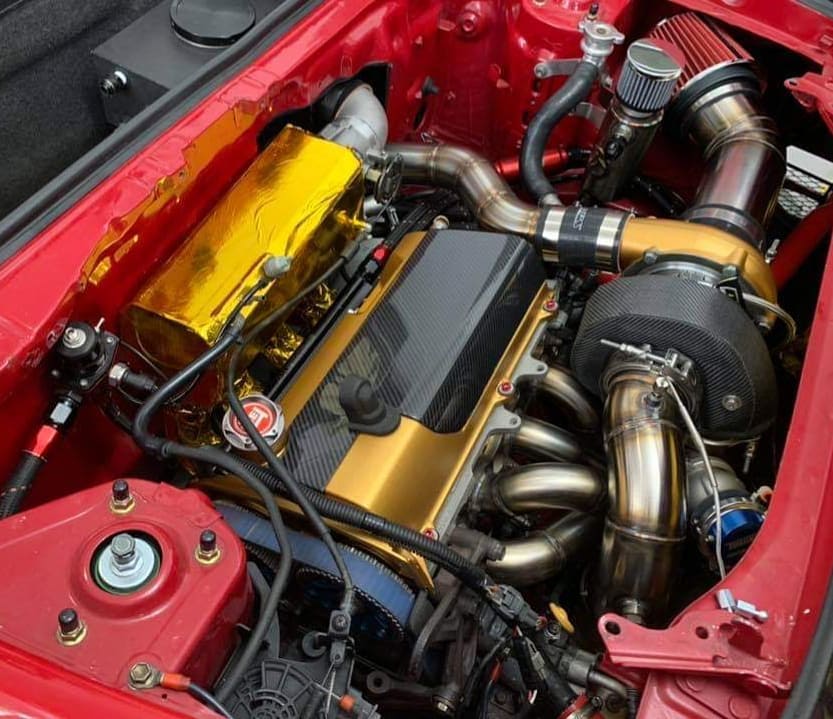
- 1x Carbon Fiber Panel
- 2 Rubber Clips (Pre-installed on cover)
- 2 Plastic Rubber Clip Retainers (Pre-installed on cover)
- 2x 8mm Ball studs
- 2x M6x30mm threaded rod
Some extra required tools/hardware
- Extra wiring for extending coil #1 and #2 wiring. (Recommended for a cleaner look).
- 10mm wrench and hand tool
Optional extra hardware
- Heat-resistant silicone for complete waterproof seal (optional). This should be applied on the edges of the cover to help promote a watertight seal for MR2s running dual fan shrouds in wet environments.
Installation:
Step 1: Check if your current intercooler pipes will allow enough room for the installation of this cover. Some intercooler pipes will not work with this setup. We sell intercooler pipes that will work if needed.
Step 2: Remove PCV Valve cover (slides off), remove PCV valve from valve cover (wiggle and pull out), Strut braces, intercooler pipes and anything in the way.
Step 3: Remove coil wiring plug for #1 and #2. Cut and extend wiring for #1 and #2 coil connector (Route it similarly to coil #3 and #4). Once extended, reinstall plugs for #1 and #2. (Optional - Can also install cover ontop of the uncut harness. Improve fitment if needed by grinding down the cover for the harness)

Step 4: Remove 10mm bolt from coil #2 and #4 and replace with supplied M6x30mm threaded rod. Thread the rod enough so both the ball stud and valve cover has enough teeth to bite on to. Thread the ball studs over the top of the rod and lightly and carefully tighten down the coil while centering the ball stud. (Do not overtighten)

Step 5: Snap the valve cover in place, reinstall everything and enjoy!
Removal Of Cover
If for any reason, you need to remove this cover, please remove it the following way or you may risk damaging the mounting clips and or the cover.
Remove this clip/side first

Once the first clip pops loose, work over to this area/clip

Important Notes:
If you remove using another method, you risk breaking the cover or the plastic mounting clips.
Silicone placement ideas (If you decide to use silicone)
- Due to the angle at which the motor is placed, we recommend placing silicone in these areas for users who expose their MR2 to rain and are using the dual engine lid fan setups OR for users who prefer a less vibrations.
- Note - The more silicone, the more difficult it is to remove the cover.

If you decide to use double sided adhesive foam
- Currently testing this
If you need to reinstall a plastic clip
-For any reason if your existing clip breaks during removal, pry off the old clip. Contact us for replacement plastic clips. Use Loctite Plastic Bonder Epoxy to adhere.
Please don’t forget to leave us feedback or give us a shout out on any of the Facebook MR2 pages/forums etc.
We really hope you like our products as much as we do and look forward to bringing you many more new and exciting products in 2018!
If for some reason you encounter an issue or problem with any of our products, please don’t hesitate to get in contact with us so we can do our best to help you out.
Email: Sales@mr2heaven.com
Thank you again for your business and support
Enjoy!
-MR2 Heaven
Disclaimer:
MR2 Heaven is not liable for any damages, injury directly or indirectly related to the installation, use or mis-use of these components.