


Parts List
- 6x M6x1.0 Screws
- 6x M6 Nuts
Optional (for stock seats add on hardware kit)
- 2x Cylindrical Spacers
- 2x M10x1.25 x 40mm Screws
Instructions
- Lay the bracket on a work bench or similar
- Screw and fasten the red canister holster onto our bracket with supplied M6 screws and pay careful attention to the orientation
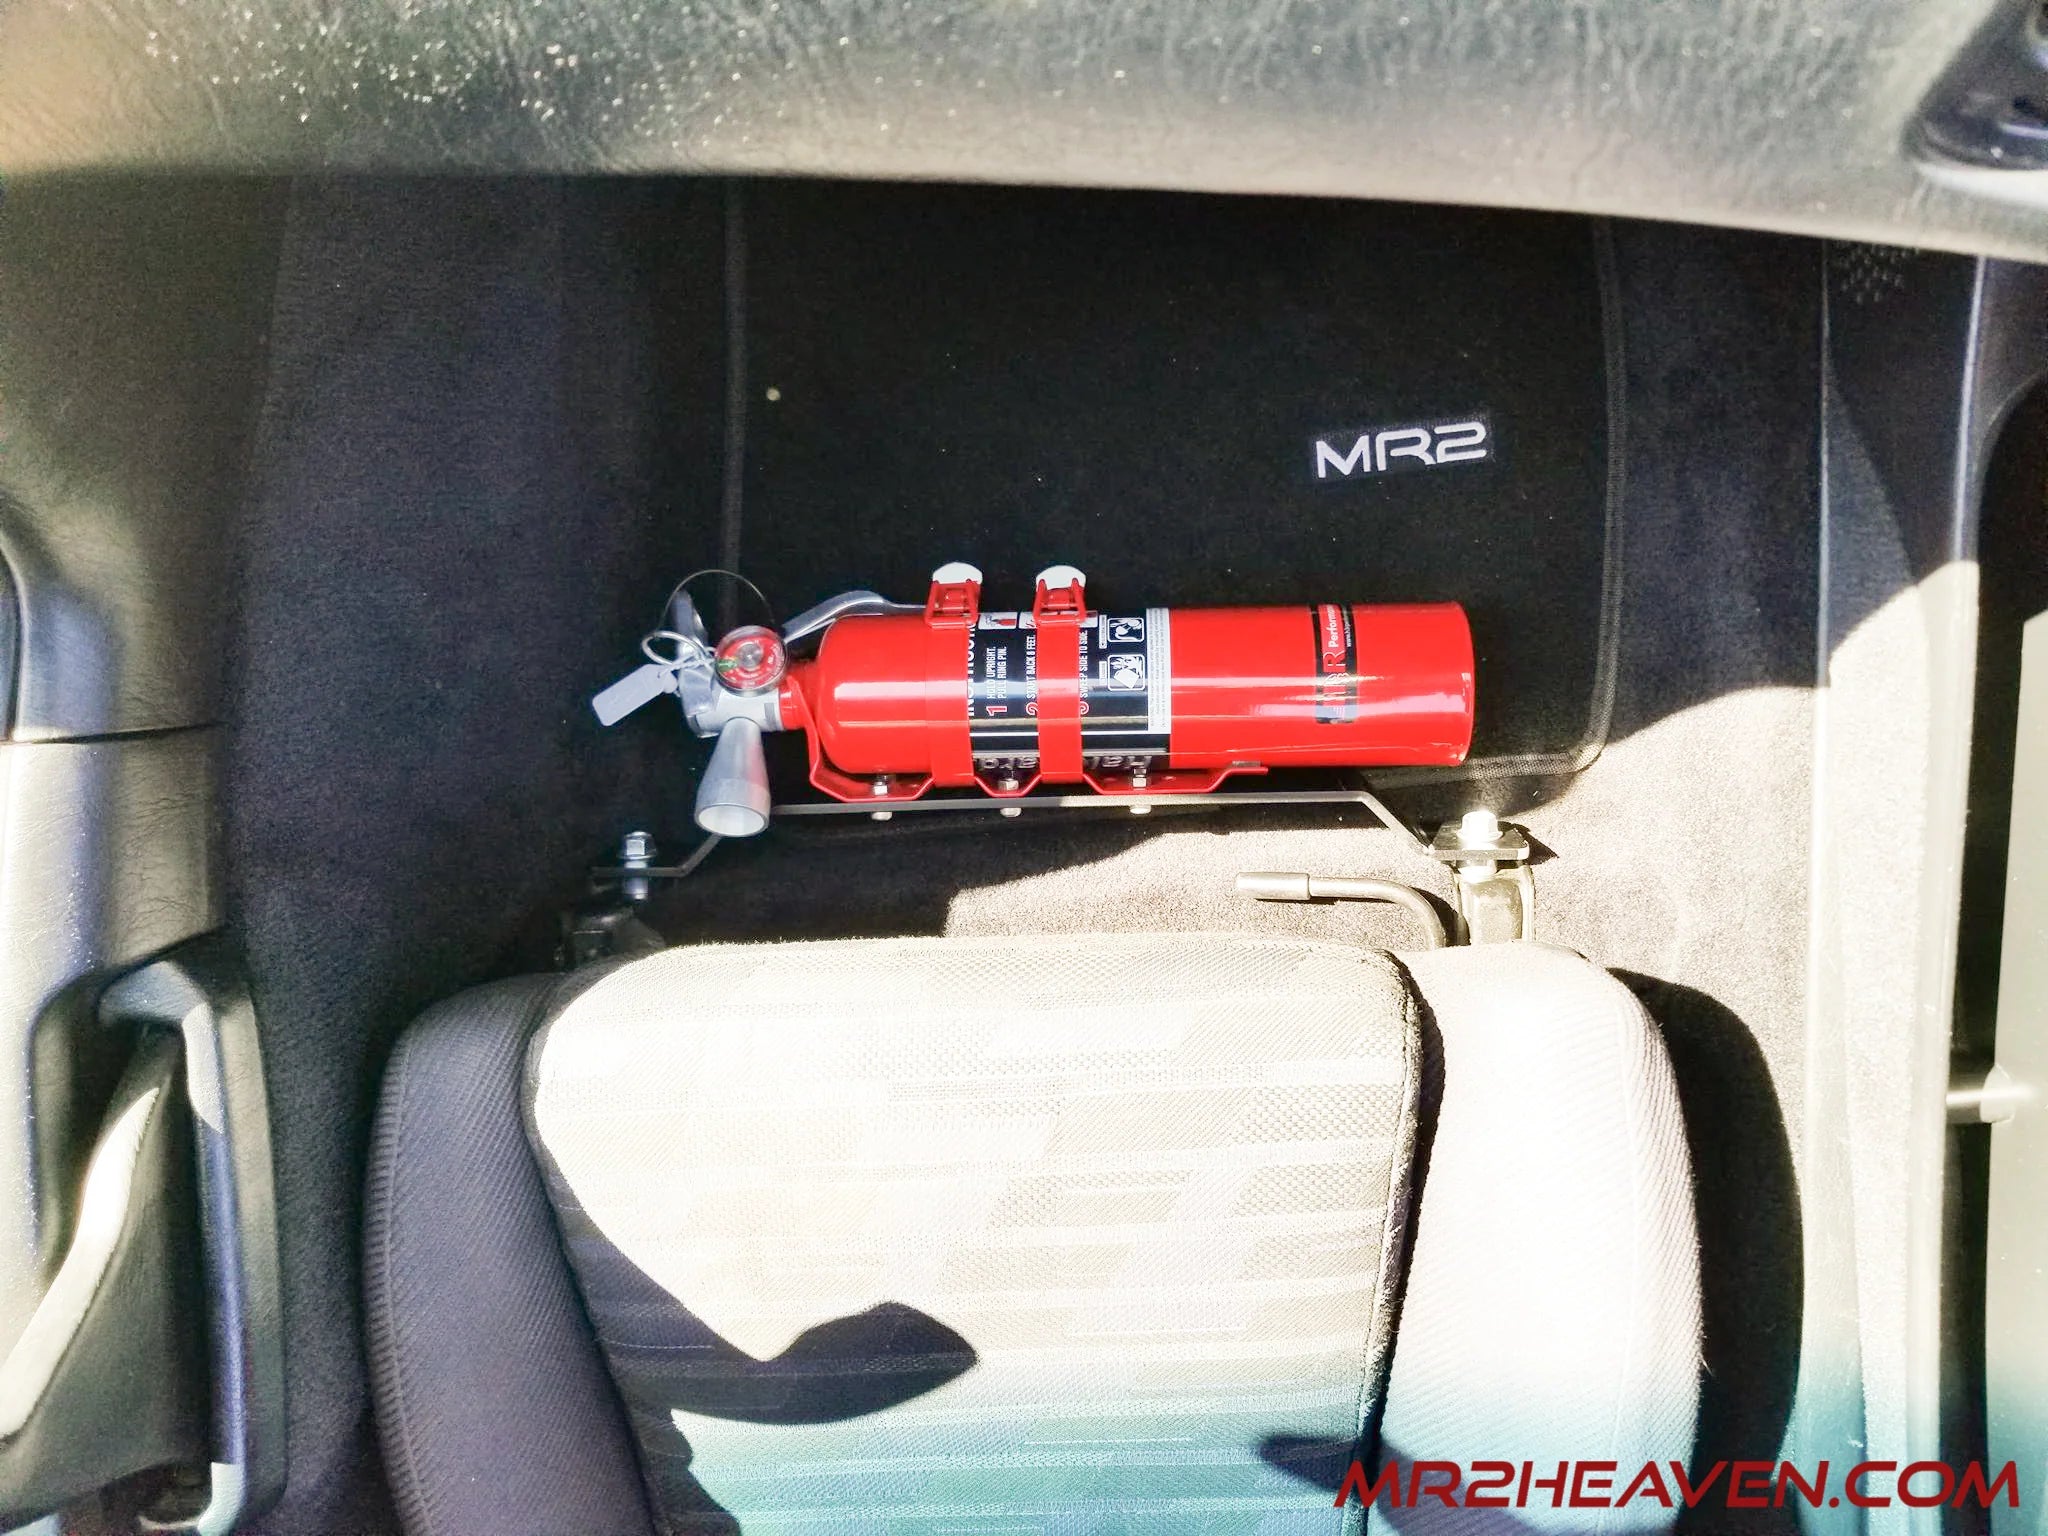
- Our fire extinguisher bracket only installs in only one orientation, that is with the 6x bolt holes closest to the left side as shown below. This is due to clearance of the fire extinguisher spray head nozzle.
- Next, without the extinguisher installed, it is time to bolt the bracket onto the passenger side seat.
- First remove the 2 existing 14mm socket sized screws holding the passenger side seat down (if you have plastic covers covering the screws, you would need a flat head to pry the covers off).
- If you have stock seats and purchased our add on hardware kit install the main bracket using the supplied 2 cylindrical spacers and the 2 40mm long screws with you to the car.
- If you have aftermarket seats, install main bracket with your original 14mm screws or longer screws from hardware store (thread pitch M10x1.25)
- With the bracket and holster installed, it is time to install your 2.5lb fire extinguisher onto the holster. Pay attention to the holster guide rails and slide the extinguisher onto holster, then test your seat for full sliding motion for any interference and re-adjust if necessary


If you have any questions, please feel free to reach out!
-MR2 Heaven