


6/7/2024 - Added torque specs for later batch pre-threaded 2 pc rotor rings
1/16/2023 - Added and optimized instructions
Disclaimer
- These brake parts are intended for race use only. They are not certified or intended to be used on public roads, and as such may not be legal for street or highway use. Whatever you do with your car is up to you and your responsibility. MR2Heaven is not liable for any damages directly or indirectly related to the use or mis-use of these components
- Please have a licensed mechanic install this kit for you if you don't know what you are doing. While we use and offer the highest quality parts available to us, we take no liabilities of any kind if you were to cause death, injure yourself or others, cause an accident of any kind. Please read disclaimers. Your use of our kit constitutes your agreement to our disclaimers.
----
Parts List
- Please make sure you have 1-2 large bottles of DOT 4 or 5 brake fluid. We recommend 2 bottles just incase.
- Please make sure you have all the supplied parts - Depending if you bought front, rear or bundle kit
- 2 or 4 rotors that are the correct orientation
- 2 or 4 calipers with correct part numbers, 120-11130 (fronts), 120-11125 (rears)
- 2 or 4 D.O.T. approved Stainless steel brake lines
- 2 or 4 Caliper Mounting Brackets (These are different for front and rear). Smaller bracket is for the rear
- Correct amount and type of brake pads
- If you bought the rear kit with 1 piece rotors, 2 hubcentric spacers
- 1 or 2 Hardware packs that is not punctured etc. Front and rear kits use the same hardware packs. Each hardware pack is enough to do 2 calipers. Each pack will contain
- 4x M12x1.25 Black Oxide Screws
- 4x M12 Flat Washers
- 4x M12 Spring Loaded Washers
- 4x 7/16 Black Oxide Screws
- 4x 7/16 Flat Washers
- 4x 7/16 Spring Loaded Washers
- Optional Parking Brake Kit
- 2x parking brake cables
- 2x mounting brackets
- 2x Wilwood parking brake calipers 120-12070 and 120-12069 (sometimes we ship these without the box due to space limitations so just make sure they are not 2 of the same calipers because they are side specific)
- 1x Hardware pack that is not punctured
- 4x Black Oxide Grade 12.9 M6x1.0 screws
- 4x M6 Flat Washers
- 4x 3/8-24 Black Oxide Screws
- 4x 3/8 Flat washers
- 4x 3/8 Spring loaded washers
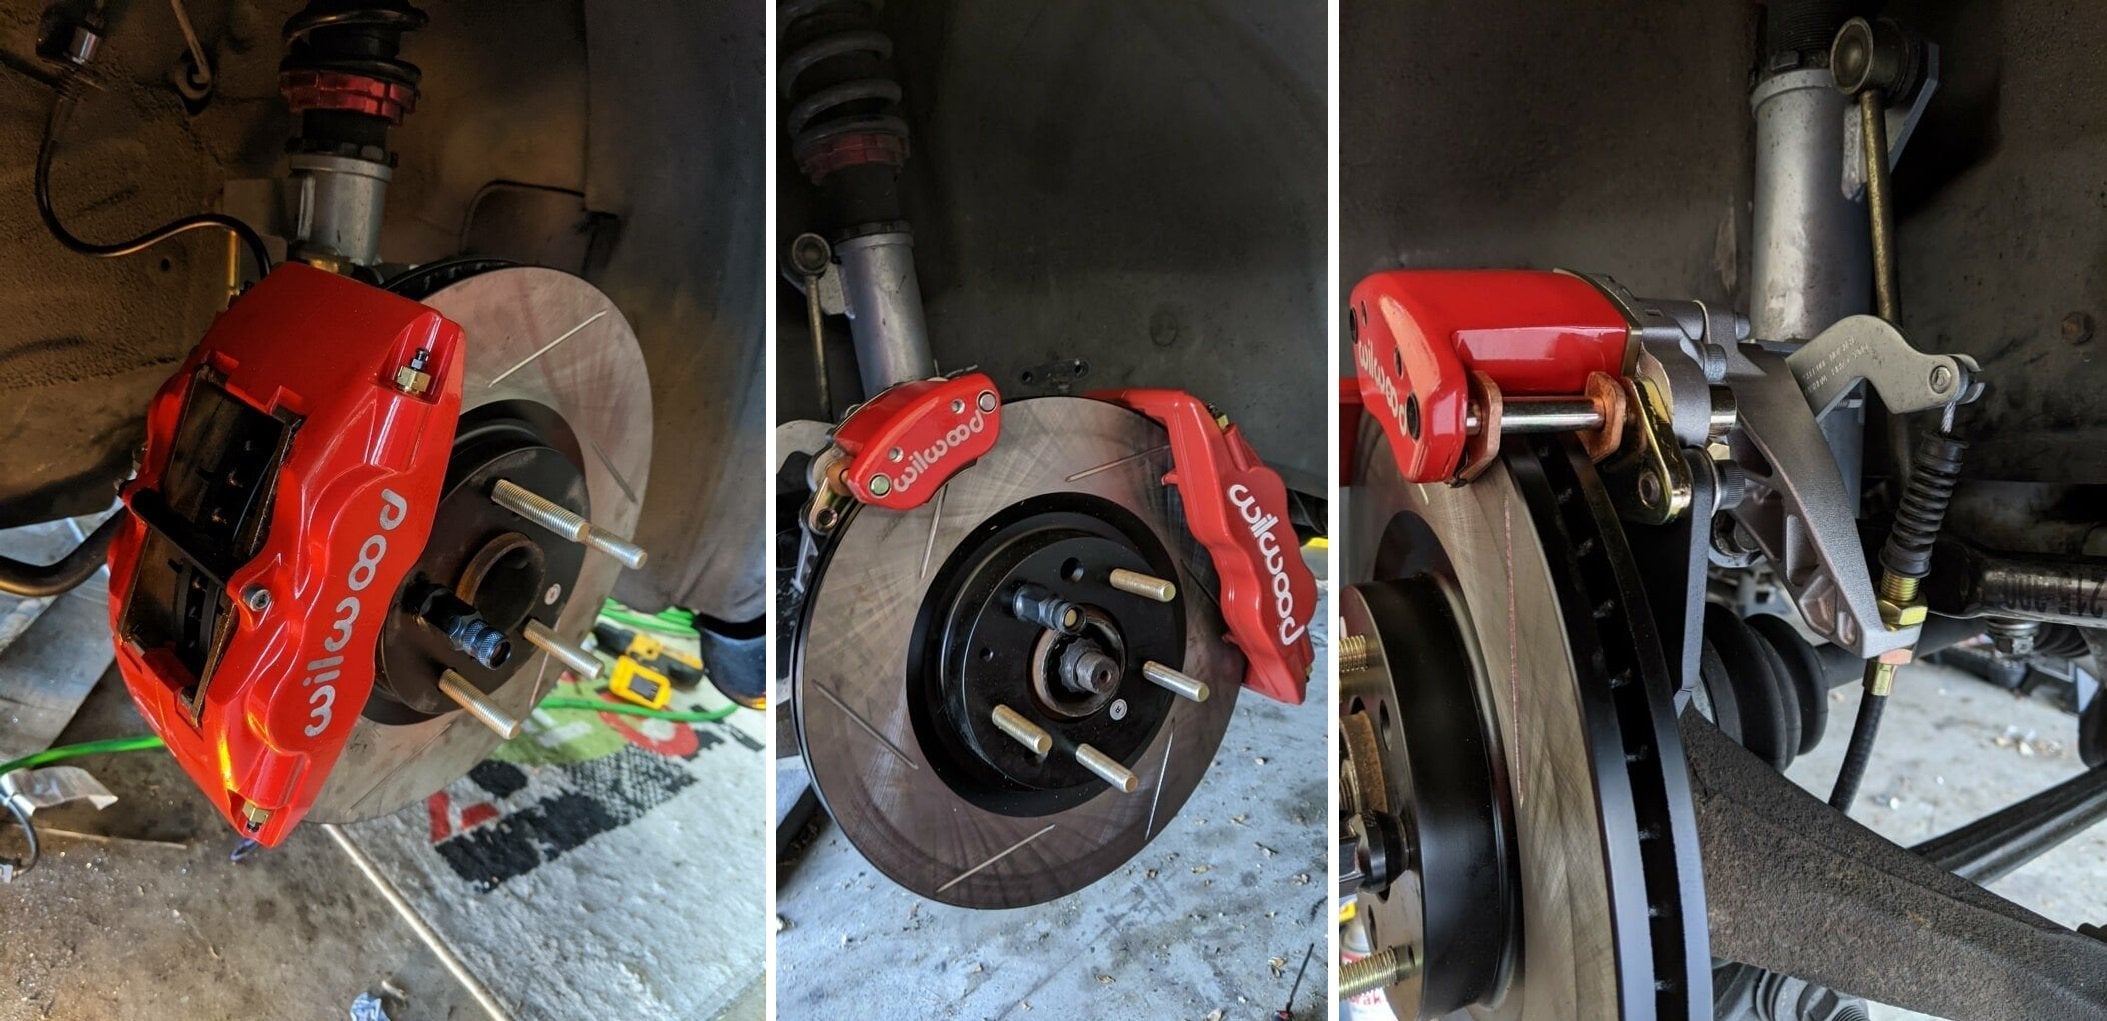
Front and Rear Big Brake Kit Installation Instructions
1. Raise the MR2 up
2. Remove the wheels, OEM flexible brake lines, brake calipers, brake rotors etc. If installing rear parking brake kit add on option, remove 2x middle "rectangular shaped" underbody panels that covers the parking brake lines leading into rear brake calipers.
3. With everything out of the way and removed, Install and mount brake caliper mounting adaptors with supplied hardware. Front and rear hardware will be bagged/separated in their corresponding packages.
- Generally, the bigger caliper mounting adaptor bracket is for the fronts. The smaller adaptor bracket is for the rears.
- The screws are identical front and rear. Use the provided shorter black oxide M12 screws to mount the caliper mounting bracket adaptor to the casted hub knuckle. Torque supplied M12 fasteners to 41ft-lb with our mounting brackets. Use of locktite blue is optional
- The long black oxide 7/16 screws will be used to mount the wilwood calipers later on. Torque supplied 7/16 fasteners to 41ft-lb with our mounting brackets. Use of locktite blue is optional

3.2 For Rear caliper mounting brackets only - Depending on your setup for the rear hub knuckle, you may have to grind 1-3mm off of both mounting flanges which protrude out of the rear hub knuckle to fit the rear caliper mounting brackets

- Don't forget to install the 2 hubcentric rings for the rear brake rotors (assuming you are using 1 piece brake rotors)
- Please note correct orientation of rotors, they are different from one another internally. Only rear plain rotors are identical left and right.
- Wilwood 120-11130 calipers are for the fronts.
- Wilwood 120-11125 are for the rears
- Do a quick spin of rear rotors with calipers installed, if rotor is contacting caliper, please contact us for different caliper adaptor mounting brackets.
- If your rear calipers are not centered against the rotor and the pads does not slide in easily for the rear or is not able to slide in at all, please contact us via email. Also, if centered and difficult to install pads, please loosen all 4 bleeder valves on caliper and compress all 4 pistons back to origin.
- If your rear brake pads sit past the rotor edge, please contact us via email
- If you have any issues with our rear kit, please contact us.
- Don't forget to tighten the circular tube bridge on the wilwood calipers after installing the brake pads.
Once everything is bolted back up, you are ready to bleed your brakes!
- If you need to install the rear optional parking brake, do that before you bleed your brakes? Up to you.
- Refer to this document - https://shop.wilwood.com/blogs/news/properly-bleeding-your-brake-system
- Bleed starting from the wheel farthest from the master cylinder, then work your way to the closest wheel to the MC.
- Bleed the outer top pointing screw first, then bleed the inner top pointing screw per caliper.
- Never bleed the screw nipples pointing downwards
10. Once everything is bled, test system for leaks by pressing hard on the brake pedal and holding for 10 seconds. Brake fluid leaks of any size is NOT ACCEPTABLE.
11. Once tested for leaks, you may proceed to put everything back on such as underbody panels and wheels.
12. Lower the car once again and test that the brakes work as intended and no leaks are present.
13. A proper bedding in of the pad is needed for optimal performance.
- Refer to this document - https://www.wilwood.com/PDF/Flyers/fl227.pdf
- Proceed with a series of 8-10 hard stops from 55-65 MPH down to 25 MPH allowing 20-30 seconds of cool down time between each stop.
- 2. Drive at a moderate cruising speed, with the least amount of brake contact possible, until most of the heat has dissipated from the brakes. Avoid sitting stopped with the brake pedal depressed to hold the car in place during this time. Park the vehicle and allow the brakes to cool to ambient air temperature.
Installation of Optional Rear Parking Brake Kit
- Remove old parking brake cables (this is a necessary step)
- Install new extended parking brake cables and rear parking brake kit as follows (Do not overtighten the nut securing the parking brake cable to parking brake caliper)
- If parking brake is too short by 1ish inch, contact us for longer cable
- Don't forget to route and secure the parking brake cables out of harms way such as the moving axle and suspension components.
- Don't forget you can adjust your parking brake cables/interior brake handle at the middle of the car
- The mounting brackets are side specific. They only install in one way, parking caliper faces 1 o clock. Torque M6 supplied fastener to the wheel hub knuckle assembly. Torque supplied M6 fasteners to 12ft-lb (144in-lbs)
- Please note that the parking brake calipers are also side specific. They also only install in only one way. Torque parking caliper with 3/8 fasteners. Torque supplied 3/8 fasteners to 25ft-lbs. If parking calipers do not slide onto rotors, please contact us.
- Do note - this is for parking or emergency brakes. If you are using this to drift your car, its inadequate and not designed for that usage.

8. Reinstall underbody panels if needed
Assembly of 2 Piece Rotors
Parts List
- 8x per rotor - 18-8 Stainless Steel 5/16-24 x 7/8" socket head screws
- 8x per rotor - Military Fastener Military Standard (MS21042-5) 5/16-24 self locking jet nuts
- 2x or 4x Top Hats
- 2x or 4x "2 Piece" Rotors
- 4x Guide Blocks (if using older batch of our rotor rings - Newer batch rings are pre-threaded and eliminates need of these blocks)
Note - Rear and front top hats are not the same, the main difference is different heights and weight so make sure you do not mix them up. Fronts are lighter and shorter.
1.) Determine if your rotor ring tabs are pre-threaded or not. 3rd batch of rotors are pre-treaded. If pre-threaded, no need for guide blocks, installation is simple & easy - skip directly to step 3. If not threaded, keep on reading. Assemble top hat with rotor ring using supplied screws and self locking jet nut hardware and tighten hardware with hand tool as much as you can but only to the point where you can still rotate screws/nuts freely by hand. At this point the hardware if tightened any more, would result in the nuts not being able to rotate freely by hand.
2.) To center top hat with rotor ring, insert 4x guide blocks as shown. It is okay to tap guide blocks with a plastic hammer or metal tool as it is a very tight fit by design, but make sure before you tap, that the 4 blocks is aligned first. The guide blocks will not scratch the hard anodized gold top hats so you do not have to be too gentle, but don't smash it too hard either. Use common sense.


.
3.
For earlier batch Non Threaded rotor rings - Keep screws and nuts unlubricated. Tighten jet nuts to 7-10 ft-lbs in a star pattern on first pass. Proceed to tighten to a final 18 ft-lbs in a star pattern for second pass. Once fully tightened, tap guide blocks out, does not matter which direction.
For later batch Pre-threaded rotor rings - We will use a slightly lower torque value due to additional clamping force provided by screws as well as self locking jet nuts. This will help prevent over-stressing fasteners and rotor threads. Assuming unlubricated components, tighten 7/16 screws in top hat to rotor ring with initial pass of 7-10 ft-lbs in a star pattern. Second pass of final 15 ft-lbs with star pattern. On backside, install jet nuts and torque to 13 ft-lbs in star pattern.
These self locking jet nuts are re-usable as long as they cannot be run on by hand
Mark or dot align each fastener with top hat with colored marker to enable quick checking. You can either mark the front side, or the back side of the rotor depending on your preference or both. It's very unlikely hardware will back out or loosen but such a simple pre-caution doesn't hurt either. Out of a few hundred 2 piece rotors and few thousand 5/16-24 fasteners already shipped, we have had 0 reported failures or any loosening.
Notes
- Please note that higher temperature racing pads usually have poor friction characteristics when brakes are cold. That means you may notice your car may not stop or bite as hard when your brakes are cold. This can be dangerous and may surprise most people if they are not aware or used to it. That is the tradeoff for most extreme high temperature brake pads orientated for racing use. General rule of thumb is the higher the temperature ranges of the pad, the worse it is for cold brake performance.
- Please don't attempt to install these if you are not a licensed automotive mechanic
- While we strive for the highest quality brake components accessible to us, we are not responsible for any damages, injuries, accidents or death to you or others due to the use and installation of these supplied parts. All responsibility is on is on you. Ordering from us or using our supplied brake parts constitutes your agreement to these disclaimers.
- The supplied optional parking brake kit is not intended for drifting or sliding of the car.
- Please make sure your brake components does NOT leak fluid before testing/operating your car. Any fluid leaks of any size is NOT PASSIBLE/ACCEPTABLE.
- Proper Bedding in of the pads is recommended for optional performance
---------